
How to Use DLSS 5 Swapper: Install and Verify
Set up DLSS 5 Swapper using the right game executable and installation route, check whether components actually load, and keep a clear path to restore.
Before your first installation
Use the official download instructions and check your GPU, driver, API, and route. Record the game’s unmodified behavior in a repeatable scene. Note existing ReShade installations, DLL loaders, overlays, and other mods before adding another injector.
Start with a game whose rules permit modifications. An application detecting a game in its library does not establish compatibility or permission to modify it.
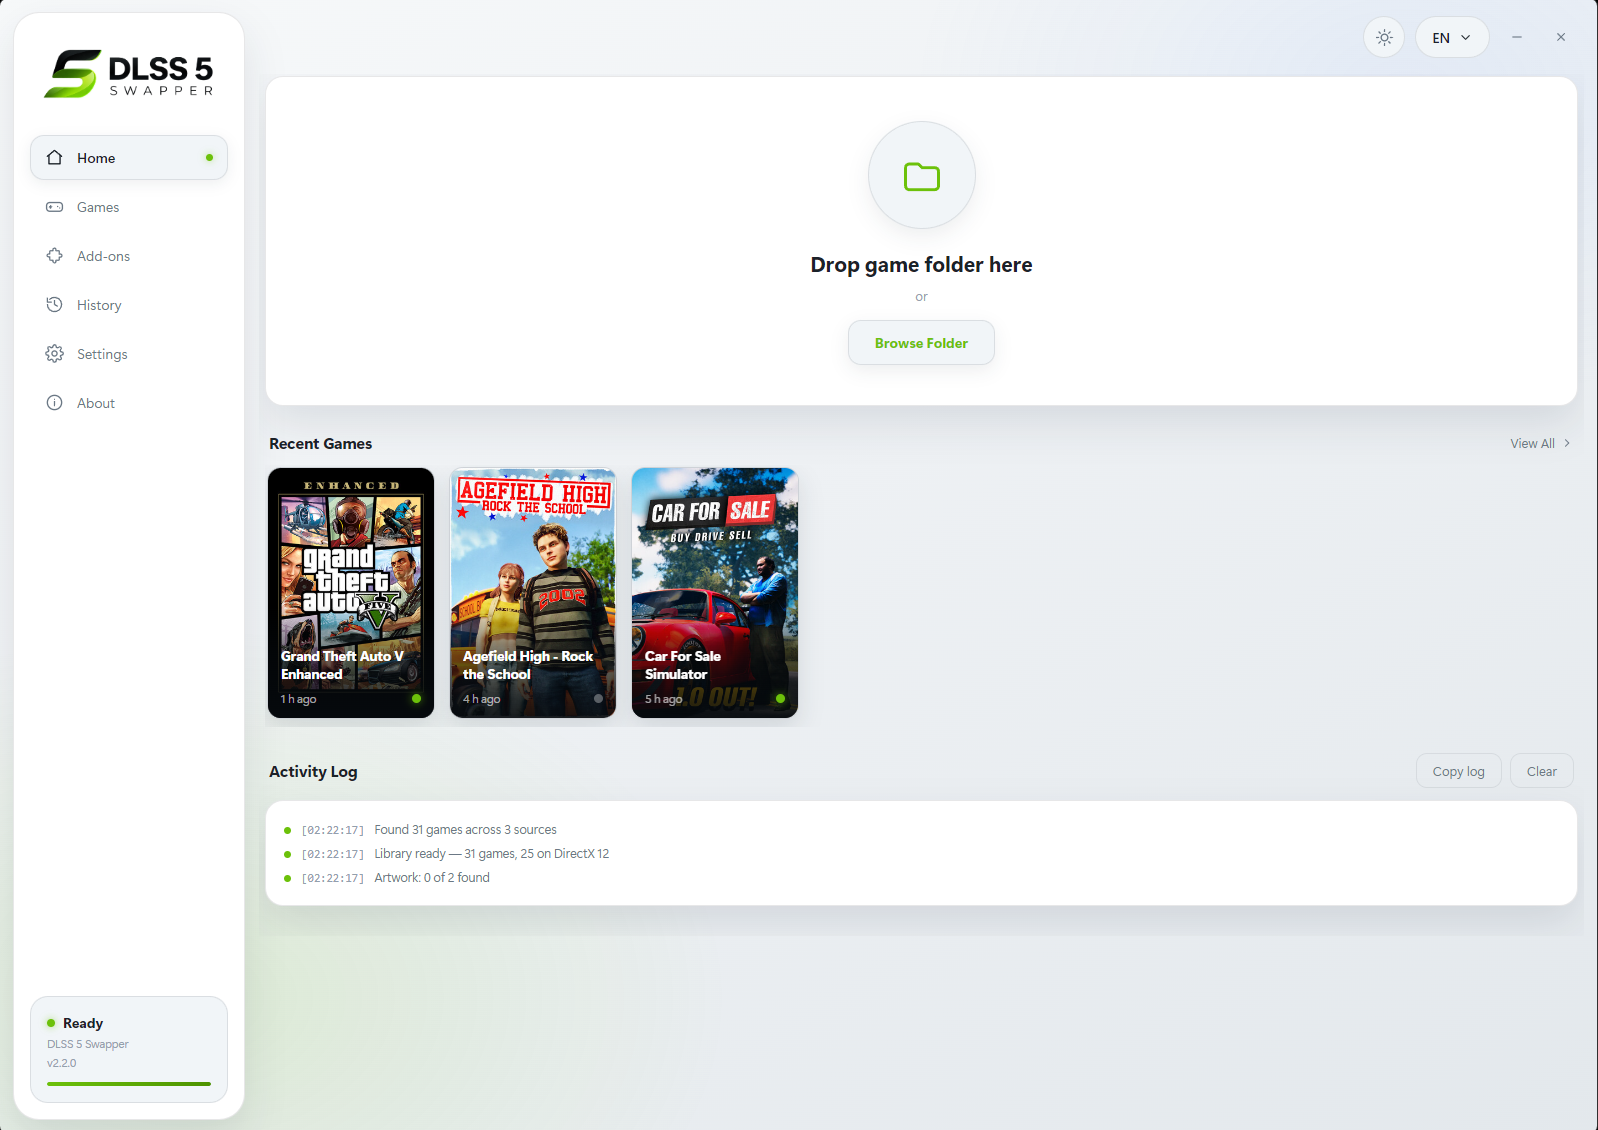
- Browse Folder
- Add the folder containing the game's actual rendering executable. A launcher or shortcut may point somewhere else.
- Games
- Find the detected library, then confirm the exact game and executable before choosing a route. Being listed is not proof of compatibility.
- History
- Review recorded changes. Keep the installation record and backups, and use Restore originals before uninstalling.
1. Select the running executable
Open the application’s game library or add a game manually. Choose the executable that renders the game, rather than a launcher, updater, shortcut, or crash reporter. For an emulator, select its executable, not a disc image.
Confirm the folder, game bitness, and rendering API. A game that offers both DirectX and Vulkan can require a different installation after its renderer changes. Record the active choice before continuing. The project README describes library scanning, manual selection, and emulator support.
For a Steam library, use the game’s local-files location to find the installed folder, then confirm which executable renders the game. Launch through the game’s normal launcher after installation. A library entry or cover image only shows detection; it is not a successful rendering test.
Check the game edition and existing mods
Record the exact game edition, build, and executable. A demo, remaster, or different storefront may use a different folder or renderer. Match the installation to the copy you actually launch, and note any existing mods that load into it.
For online or anti-cheat-protected games, check the current game and platform rules before injecting components. See online-game permissions. Swapper works with installed game executables; integrating DLSS into an Unreal Engine development project requires the engine’s separate SDK workflow.
2. Choose one route
Choose a route before you install
Start with your graphics card and game. We'll narrow down the documented route and show what still needs checking.
Prefer the written checklist?
- Investigate the native DLSS / RenoDX route
- The project documents a native route for eligible DX12 games. This is a starting point; it does not establish a successful neural pass for your game.
- Investigate the ReShade / Feeder route
- The project lists this route for compatible games without native DLSS. Success still depends on the game's inputs, matched components and runtime.
- Check the native-input consumer before installing
- Native DLSS with this renderer needs a route-specific check. Eligible OptiScaler paths have additional input, bitness and model requirements; the Blackwell model is not a universal older-card solution.
- Check the legacy renderer or emulator route
- Legacy APIs need renderer- and bitness-specific bridging. This helper cannot establish those conditions from a generic renderer label.
- Check whether the game offers DirectX 11
- Swapper v2.2.7's Feeder integration does not directly support DX10. A feature in a separate Feeder release may not be available through this app.
- Check support for this GPU before installing
- Swapper's ReShade / Feeder requirements list RTX 20, 30, 40 and 50 families. Support for AMD, GTX or Intel in another upscaling component does not establish support for this neural-rendering route.
- The download requires Windows 10/11 x64
- The v2.2.7 installer and portable application are for Windows. Linux/Proton and other systems do not have a confirmed installation procedure in this guide.
- Check the game's rules first
- An installation route cannot tell you whether a game permits injected components. Do not use a technical support listing as permission for an account or protected session.
The compact F8 panel is limited to the documented x64 DX11/DX12 Feeder or RenoDX v4.7 setup, with Swapper running. Multipass uses Home.
Your driver is newer than the publisher's last measured baseline. v2.2.7 permits installation with a warning; this is not proof that all newer drivers fail.
| Situation | Starting point | What still needs checking |
|---|---|---|
| Game supplies native DLSS input | Native DLSS / RenoDX route | Correct native consumer and in-game DLSS setting |
| Game has no native DLSS input | ReShade / Feeder route | Supported API, bitness, depth and motion inputs |
| You specifically want repeated neural passes | Multipass route | Its separate consumer and supported renderer |
| You are using OptiScaler DLSS-NR | That route’s documented prerequisites | x64 native input and appropriate model conditions |
Do not stack the ordinary RenoDX neural consumer and the Multipass consumer. Read the non-native DLSS guide or Multipass guide before selecting those paths.
3. Install and inspect the result
Close the game, choose the route, and use Install. Wait for completion and read the final result. Version 2.2.7 corrected an earlier message that could claim success before installation had finished. If you see EPERM, inspect the protected folder and permissions identified by the error; the release notes recommend appropriate administrator permission or a game location you can write to. Do not keep retrying an incomplete installation while the game is running.
Retain _DLSS5_Backup and the installation record. The v2.2.7 notes document these installation and recovery changes.
4. Verify in layers
- Launch the same game executable and renderer you selected.
- Confirm that the expected components appear in the appropriate in-game panel. Native DLSS and Feeder have different input requirements.
- If using the compact Swapper overlay, keep Swapper running and try its configured hotkey, F8 by default. This overlay supports the documented x64 DX11/DX12 configurations. Multipass uses Home instead.
- Check connection and runtime status. An application preview is not a connected game.
- Compare a fixed scene with the effect enabled and disabled. A visible overlay, changed setting, or increased GPU load alone does not prove a completed neural pass.
If your keyboard has no Home key
First identify the panel you need. The compact Swapper panel defaults to F8, while the Multipass route uses the ReShade panel opened with Home. Check your keyboard manufacturer’s documented Home shortcut or use Windows’ On-Screen Keyboard to send that key. Once the correct panel is available, use its documented hotkey setting if you want a different key. Do not change a random injector’s shortcut and assume it changes Swapper’s panel. If the panel still does not open, continue with overlay checks.
If it fails, or you want to change routes
Use the diagnostic decision table to separate installation, injection, overlay, and rendering problems. Save diagnostics before changing several settings at once.
Close the game and choose Restore originals before switching routes. Relaunch the unmodified game to check recovery. Follow complete restoration before uninstalling the desktop application; closing or deleting Swapper does not undo its game changes.
Related Articles
DLSS 5 Swapper vs DLSS 5 Manager: Choosing a Tool
Comparison
Compare the documented DLSS 5 Swapper and DLSS 5 Manager releases by installation, components, diagnostics, and recovery, without unsupported FPS rankings.
DLSS 5 Swapper Compatibility: RTX 3060 and Beyond
Compatibility
Check DLSS 5 Swapper requirements for RTX 3060 and other GPUs, separating Windows, drivers, APIs, models, game routes, and the compact overlay's limits.
DLSS 5 Swapper Download: Installer or Portable
Download
Find the official DLSS 5 Swapper download, compare installer and portable packages, verify the checked release, and choose a version with a recovery plan.